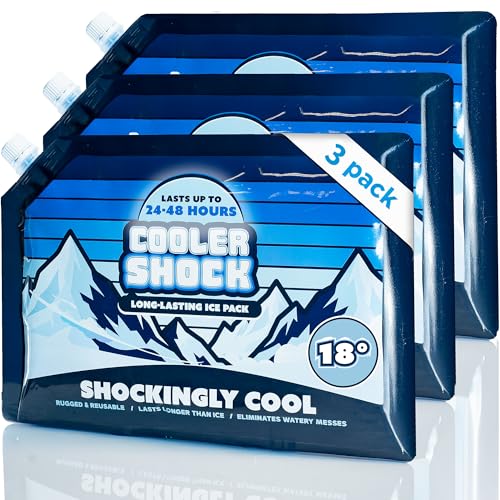

Pre-chill your camping cooler by filling it with sacrificial ice, frozen water bottles, or reusable cold packs several hours before packing. This cools the cooler’s warm interior so it is less likely to absorb heat from your food and drinks. Right before loading, remove the pre-chill ice, drain excess water if needed, and pack items that are already cold.
Pre-chilling does not replace safe food handling, enough ice, or careful temperature control. It gives your cooler a colder starting point. Use the cooler’s manual for model-specific care, and follow current food-safety guidance for the foods you bring.
Why pre-chilling helps
A cooler does not create cold. Its insulation slows heat moving from warmer surroundings into the contents. If the cooler has been stored in a warm garage, car, or sunny spot, its walls and liner may be warm. When you load cold food into that space, some of the food’s cooling capacity gets used to cool the cooler itself.
Pre-chilling lowers the temperature of the cooler’s interior before the trip. It can help ice last longer, but results depend on cooler construction, starting temperature, outdoor heat, sun exposure, how often the lid opens, and how the cooler is packed. It cannot compensate for warm food, a damaged seal, or insufficient ice.
Steps to pre-chill your cooler
1. Start with a clean, dry cooler
Remove old ice, food scraps, and standing water. Wash the interior with mild dish soap and water, then rinse and dry it. Cleaning methods vary by liner and cooler model, so check the manufacturer’s care instructions before using bleach, abrasive pads, solvents, or other cleaners. Do not mix cleaning products. If the cooler has been used for raw meat or spoiled food, follow applicable public-health guidance for cleaning and sanitizing food-contact surfaces.
2. Move it out of heat
Place the cooler in a cool, shaded location while it pre-chills. Avoid leaving it in direct sun or a hot vehicle. If possible, bring it indoors or into a temperature-controlled space. Keep the lid closed between checks so warm air does not keep entering.
3. Add sacrificial cooling material
Fill the cooler with ice, frozen water bottles, or reusable cold packs. These are for pre-chilling, not necessarily for the trip’s final load. Use enough to contact much of the interior; a small handful of ice in one corner may not cool the whole space evenly. Keep the lid closed while the cooler chills.
Allow several hours when practical. Overnight pre-chilling can be convenient, especially after a cooler has been stored somewhere warm. There is no single required chilling time: cooler size, material, room temperature, and amount of cooling material all affect how quickly the interior cools. A longer period is useful if the cooler still feels warm inside.
4. Remove the pre-chill load and pack promptly
Before packing food, remove the sacrificial ice or cold packs. Drain excess meltwater if it would soak packaging or interfere with the cooler’s drain design. A little cold water can help transfer heat, but managing water depends on the food packaging and cooler instructions. Do not assume the drain should remain open during use; follow the cooler manual.
Pack food and drinks while they are already cold. Put items you will need last at the bottom and frequently used items nearer the top. Keep raw meat sealed and separated from ready-to-eat food to prevent cross-contamination. Use leak-resistant containers, and keep food protected from meltwater unless packaging is designed to stay submerged.
5. Add trip ice and close the lid
Add fresh ice or frozen packs around and over the contents, leaving as little unnecessary air space as practical. The right amount depends on trip length, weather, cooler capacity, and access to replacement ice. A thermometer inside the cooler gives a more useful check than judging by touch. Place it where it can represent the food area, and check it without leaving the lid open for long.
Practical checks before departure
- Check the starting temperature: Cooler contents should be cold before loading. Pre-chilling the box does not chill warm groceries quickly or safely.
- Check the lid and seal: Confirm the lid closes fully and latches as intended. If a seal looks damaged or the lid does not fit correctly, consult the manufacturer rather than improvising a repair.
- Check the drain: Make sure the plug is installed as directed for transport. A loose or open drain can release meltwater, but drain position and use vary by model.
- Check food separation: Keep raw animal products contained and apart from ready-to-eat food. Bring separate containers if that makes separation easier.
- Check the temperature during the trip: Use a food thermometer and follow official food-safety guidance for safe holding temperatures and discard decisions. Do not rely on ice appearance alone.
For more context on choosing cooler capacity and ice performance, see our guides to coolers for hot-weather camping and coolers for longer camping trips. These topics affect how much ice and storage space you may need, but pre-chilling steps remain the same.
Common pre-chilling mistakes
- Loading warm food: Pre-chilling cannot make warm groceries safe quickly. Refrigerate food before packing, and keep perishable items cold during transport.
- Using too little sacrificial ice: A small amount may cool only part of a large cooler. Spread the cooling material across the interior.
- Leaving the lid open: Repeatedly checking or packing slowly lets warm air replace cold air. Organize food first, then load quickly.
- Pre-chilling in direct sun: Sun heats the exterior and works against the cooling process. Choose shade or an indoor location.
- Assuming pre-chilling guarantees a safe temperature: Duration, heat, lid openings, and ice supply all matter. Monitor temperature and use current official food-safety guidance.
- Putting food directly in meltwater without planning: Water can leak into packages or spread contamination. Seal food and manage water based on packaging and the cooler’s instructions.
Optional supporting equipment: a hard cooler can provide an insulated space for pre-chilling and transport. For example, the Coolers and Refrigeration category includes hard-sided options such as the Igloo model below. Cooler features and care instructions vary, so check the specific model manual.

Igloo Polar 120 Qt Hard Cooler with UV Protection
Pros
- Holds 188 cans
- Lightweight for a 120-quart cooler
- UV-inhibited lid resists sun damage
- Stain- and odor-resistant liner
- Threaded drain plug for hose hookup
Cons
- Lid feels light and less rigid
- Ice retention trails premium rotomolded coolers
- No wheels for this large size
Specifications
| Brand Name | Igloo |
|---|---|
| Included Components | Cooler |
| Recommended Uses For Product | Camping |
| Model Name | Polar-Igloo |
| Team Name | Igloo |
| League Name | NCAA |
| UPC | 034223445775 |
| Number of Items | 1 |
| Global Trade Identification Number | 00034223445775 |
| Unit Count | 1 Count |
Verify the current product variation before purchase; specifications may change.
Detailed Review
What stands out in the currently available product data:
- UV-inhibited lid resists sun damage and helps prevent the plastic from becoming brittle after long days outdoors.
- Stain- and odor-resistant liner wipes clean easily, so fish, marinades, or spilled drinks don't leave a lasting smell.
- Threaded drain plug connects to a standard garden hose for quick, controlled draining and cleanup.
- Reinforced swing-up handles with tie-down loops make it easier to lift, carry, and strap down in a truck or boat.
- Dual snap-fit latches secure the lid, and the snap-lock child safety latch adds peace of mind around kids.
- Lightweight construction for a 120-quart cooler, so you can move it when full without needing a second person.
Best For / Avoid If
Best for buyers prioritizing
- Holds 188 cans
- Lightweight for a 120-quart cooler
- UV-inhibited lid resists sun damage
Consider another option if
- Lid feels light and less rigid
- Ice retention trails premium rotomolded coolers
- No wheels for this large size
Limitations and safety notes
Pre-chilling can improve the starting conditions, but it cannot guarantee a particular ice-retention time or food temperature. Heat, direct sun, cooler condition, packing choices, and lid access change performance. Keep the cooler shaded at camp, avoid unnecessary opening, and separate food that needs frequent access into another container when practical.
For cleaning, food storage, and disposal of spoiled food, follow applicable local public-health guidance and the cooler manufacturer’s instructions. If camping in bear or other wildlife country, follow land-manager rules for food storage and disposal; a cooler alone may not satisfy local requirements. Weather, water, and wildlife requirements vary by location, so check official guidance for your destination.
FAQs
How long should I pre-chill a camping cooler?
Several hours is a useful starting point; overnight is practical when the cooler has been warm. No fixed time applies to every cooler. Keep the lid closed and allow more time for a large or warm cooler.
Can I pre-chill a cooler with frozen water bottles?
Yes. Frozen water bottles can cool the interior without creating as much loose meltwater as ice. Use bottles that can safely freeze, leave room for water expansion, and do not use damaged containers.
Should I leave the meltwater inside?
It depends on packaging and the cooler’s design. Cold water can help transfer heat, but it can soak or contaminate food packages. Keep food sealed, drain water when appropriate, and follow the manual’s instructions for the plug.
Does pre-chilling mean I can use less ice?
It may reduce the initial heat load, but it does not establish how much ice your trip needs. Trip length, outside temperature, sun exposure, cooler size, and lid openings matter. Pack enough cooling material for conditions and monitor food temperature.