
Organize small items in a hiking daypack by grouping them by purpose, packing them in a few pouches, and placing each group where you can reach it when needed. Keep urgent essentials accessible, protect moisture-sensitive items, and use a consistent spot for every item. This cuts down on rummaging without adding unnecessary weight or clutter.
1. Sort items by use and access
Before packing, lay out your small gear and sort it into practical groups. Common groups include navigation and communication, first aid, repair, food, personal items, and waste. Your exact list depends on route, weather, trip length, and local rules.
- Keep-close essentials: Map, compass, phone, headlamp, whistle, and other items you may need quickly. Choose pockets you can reach without unpacking the main compartment.
- First aid and personal care: Put first-aid supplies together. Keep medications in their original packaging when appropriate, and follow the directions on their labels.
- Food and cleanup: Group snacks, utensils, and a small waste bag. Keep food sealed and follow local food-storage and wildlife guidance.
- Repair and backup items: Keep items such as a repair patch or spare batteries together, where they will not snag or puncture other gear.
Separate items you may need on the trail from items you expect to use only at a rest stop. Emergency gear should not be buried beneath lunch or spare clothing. For broader daypack planning, see this hiking daypack overview and the site’s Backpacks and Hiking Gear section.
2. Use a few pouches, not many
Small pouches keep loose items from collecting at the bottom of the pack. Use a limited number, with each pouch assigned a clear purpose. Too many tiny bags can slow access and make it harder to notice missing items.
Choose pouch size to match its contents. A first-aid pouch should fit the supplies you carry and open easily. A small electronics pouch can keep cables and a battery together. A bright color can make important gear easier to spot; a clear pouch can help you identify contents without opening it. Neither style replaces checking what is inside.
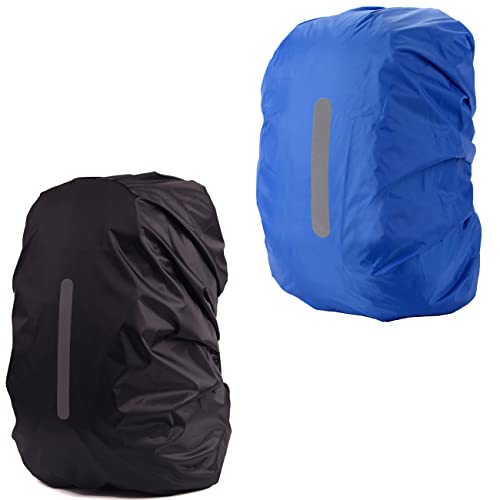
Use water-resistant pouches or a waterproof bag for items that must stay dry, such as spare socks, maps, or electronics. A water-resistant pack does not guarantee dry contents in sustained rain, immersion, or a damaged closure. Use protection suited to conditions, and check equipment instructions for care and use.
3. Place items by frequency and weight
Put items you use often in easy-to-reach pockets. Keep essential navigation and communication items accessible, but secure them so they cannot fall out when you bend or open the pack. Put less-used small gear in the main compartment, grouped in pouches.
Pack heavier items close to your back and centered when possible. Keep small objects from shifting by placing them inside a pouch or filling gaps with soft gear. Avoid putting sharp or rigid objects against your back, and keep items from pressing into your body when the pack is worn.
Do not rely on pocket labels alone. Pack layout varies, and pockets may be too small, exposed, or difficult to reach for a particular item. Try your arrangement at home, then adjust it so you can retrieve key gear while wearing the pack.
4. Keep water, food, and batteries in mind
Keep water containers closed and upright where practical. Separate them from electronics and paper items, and check lids before setting out. If you carry a water filter or treatment product, follow its specific instructions and applicable official guidance. Do not assume a filter removes viruses unless its supplied documentation confirms that capability.
Keep snacks contained to limit crumbs and spills. Store food in the way required by local land-management rules and wildlife guidance; a pouch inside a daypack is not a substitute for required food storage. Pack out wrappers and other waste.
Protect batteries and electronics from moisture, impact, and accidental activation. Follow the device manufacturer’s instructions for storage, charging, and temperature limits. Do not mix loose batteries with metal objects such as keys, which can create a short circuit. If you carry a power bank, secure it so its cable or connector cannot snag.
5. Make a repeatable packing check
Use the same packing routine before each hike. Check the route and forecast, then match your gear to the conditions and trip. Confirm that essential items are present, accessible, and usable. Refill or replace supplies that are empty, expired, damaged, or unsuitable for the planned outing.
- Open each pouch and confirm its contents.
- Check that phone, headlamp, and other battery-powered devices have suitable charge and work as expected.
- Secure closures, water containers, and items attached outside the pack.
- Make sure first-aid supplies and medications suit your needs and follow their labels.
- Wear the loaded pack briefly and check for shifting, pressure points, or pockets that are hard to reach.
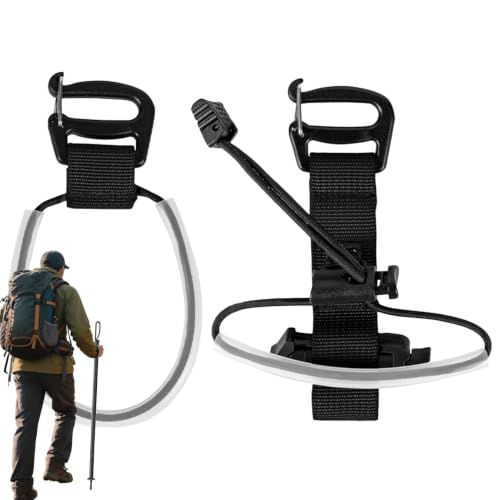
For trips involving trekking poles, review the pack’s attachment points and secure poles so tips and straps cannot catch on brush or other gear. See this trekking pole overview for related gear context. Adjust the system to the pack and pole manufacturer’s instructions.
Common organization mistakes
- Overpacking pouches: A pouch that is hard to close or find slows access. Carry only useful items for the route and conditions.
- Putting everything in the same pocket: Mixed gear makes urgent items harder to locate. Keep a consistent place for essentials.
- Assuming water resistance means waterproof: Protect critical items separately when conditions call for it.
- Attaching loose gear outside: Dangling items can snag, fall off, or make noise. Secure them properly or pack them inside.
- Using a fixed checklist for every outing: Gear needs change with weather, terrain, duration, and local requirements. Review the plan each time.
Optional supporting equipment
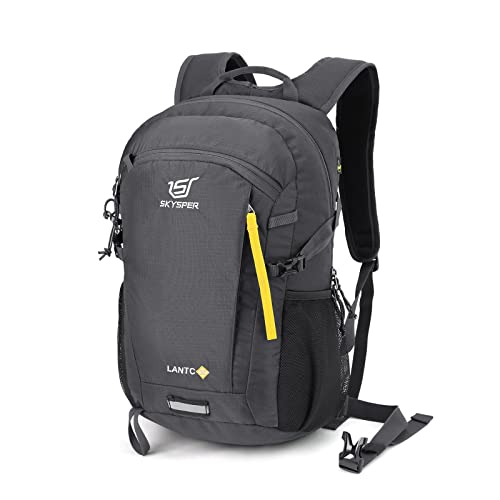
A daypack with separate compartments can help keep small-item groups apart, but a new pack is not required. For example, the SKYSPER Small Hiking Backpack is described as a 20-liter pack with multiple compartments, an adjustable chest strap, and a safety whistle. Check its supplied information and fit against your own needs; organize and test any pack before relying on it on trail.
Pros
- Lightweight 20L daypack
- Water-resistant 600D polyester and 210D nylon
- Breathable back panel
- Trekking pole fixtures
- Reflective details and safety whistle
Cons
- Water-resistant, not waterproof
- Limited capacity for overnight equipment
- No stated laptop compartment
Specifications
| Color | Lantc20-darkgray |
|---|---|
| Size | 20 l |
| Dimensions | 7.4 x 10.3 x 16.9 inches |
| Weight | 1.212542441 pounds |
| Product Group | Outdoors |
| Binding | Sports |
Verify the current product variation before purchase; specifications may change.
Detailed Review
What stands out in the currently available product data:
- 20L capacity fits day-hike essentials, layers, snacks, and hydration gear
- Water-resistant fabrics help manage light rain and trail splashes
- Breathable grooved back panel improves comfort during active travel
- Adjustable chest strap and removable straps support flexible carrying
- Trekking pole fixtures keep poles accessible between use
- Reflective details and included whistle support low-light visibility
Best For / Avoid If
Best for buyers prioritizing
- Lightweight 20L daypack
- Water-resistant 600D polyester and 210D nylon
- Breathable back panel
Consider another option if
- Water-resistant, not waterproof
- Limited capacity for overnight equipment
- No stated laptop compartment
Frequently asked questions
What small items should stay easiest to reach?
Keep items you may need quickly accessible, such as navigation tools, phone, whistle, and headlamp. Choose locations that close securely and remain reachable while wearing the pack. Your route and emergency plan determine which items matter most.
How many pouches should I use?
Use as few as needed to keep different categories separate. A practical setup might use one pouch for first aid, one for repair or electronics, and one for small personal items. Adjust it to your gear; avoid adding pouches that create more searching.
Should I keep my phone in an outside pocket?
Only if the pocket closes securely and protects the phone from conditions expected on the hike. Use additional moisture protection when needed, and keep the phone accessible enough for navigation or communication. Follow the phone manufacturer’s guidance for temperature and water exposure.
How do I keep small gear from getting wet?
Put moisture-sensitive items in a properly closed waterproof bag or another suitable protective container. Pack rain protection for the conditions, and inspect closures before leaving. A water-resistant backpack alone may not keep contents dry in prolonged or severe exposure.